Friday, December 9, 2011

Semester 1

I have completed my first semester and felt that the end of the semester work on the blog should be something simple. So I decided to post random photos that are from my phone that I have taken through out the semester(photos related to Studio I).

This photo I took the very first day of school and studio on August 22nd. It is of my very first Studio assignment. It was drawing straight lines. 

This next photo is from a book I had to make as an assignment for Arch-100(Introduction to Architecture). The assignment was to define architectural terms using our own photos of selected buildings in Chicago. 

This photo is of my very first draft I did of my liquid container. It was done on trace paper. This draft took me a very long time due to the fact that I had to sit there and figure it out as I went along. 

This photo is also from the liquid container project. It was during proposals of Part II, where we had to tell a story of the function of the container. This was a simple proposal I had drafted and then my professor took the container and placed the parts on the page and said: "oh, now that would be interesting to see." Which means 'do this.' Which is exactly how my final Arches Paper looked. 

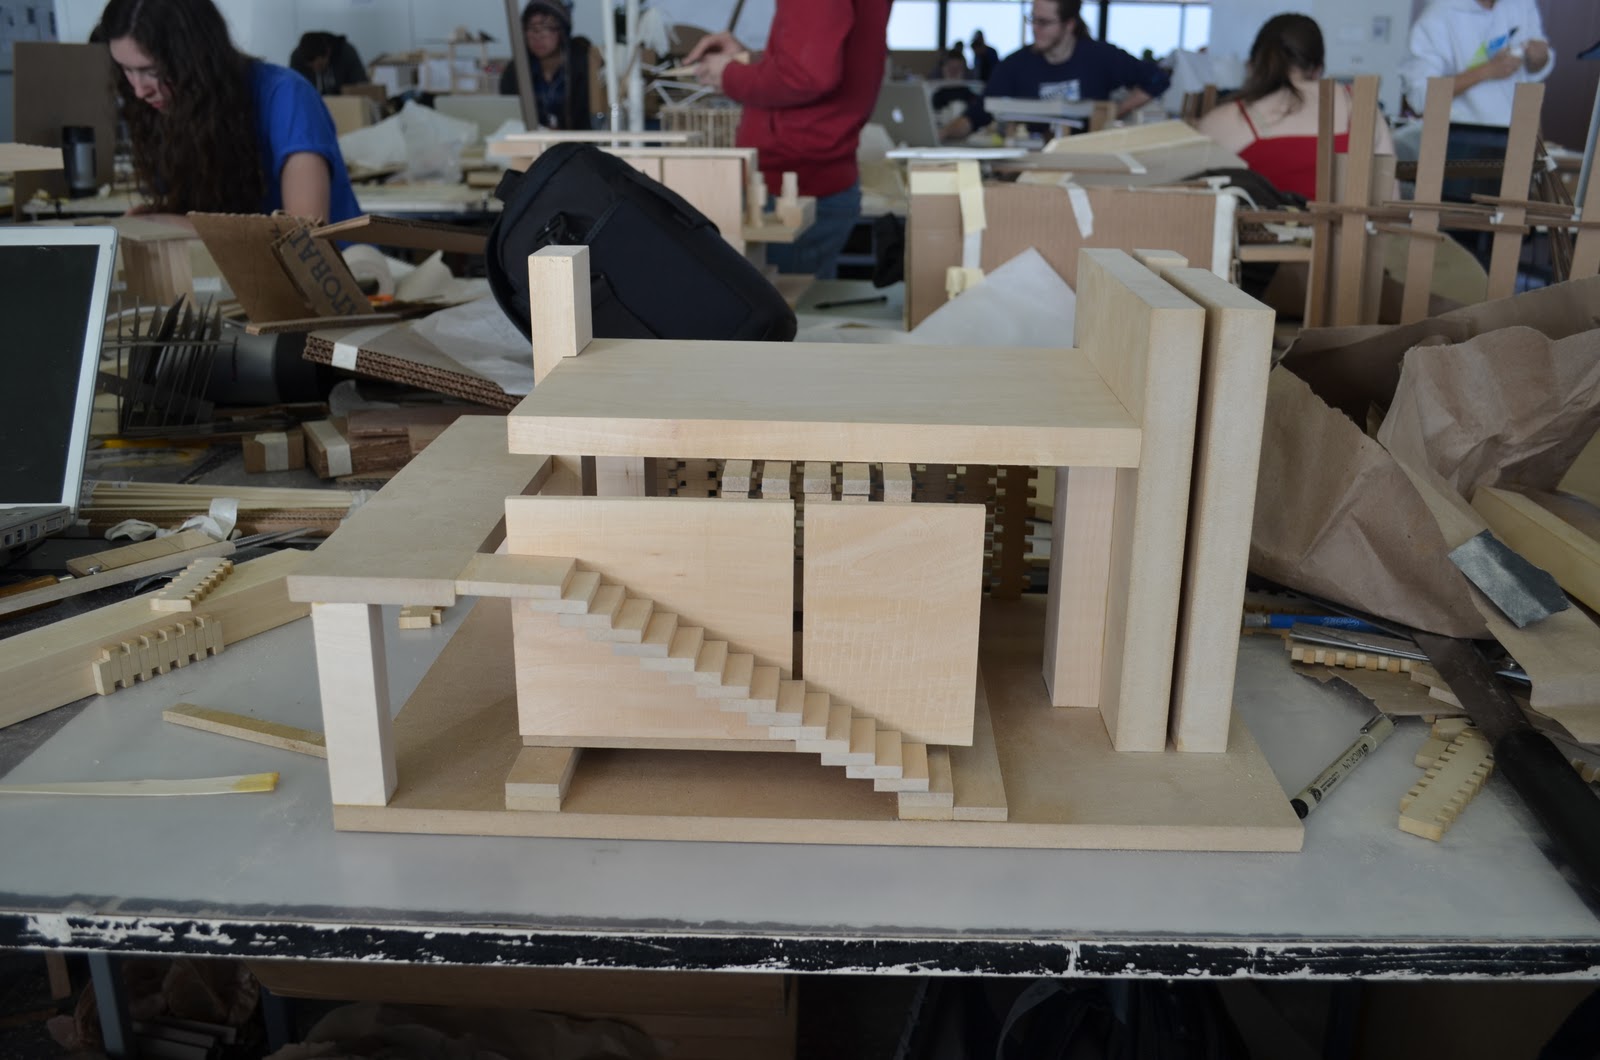
The project after the liquid container was the axonometric stairs. The first thing we had to do after the selection of the stairs was to draft, on trace paper, a plan and elevation of the stairs.

Soon after that the constant measurement taking had to be done. There were so many times that I had to keep getting up from my desk and had to take measurements of the hallway that the stairs lead to in the basement of Crown Hall. I then started to take pictures of the hall and draw on them digitally with the proper measurements. 

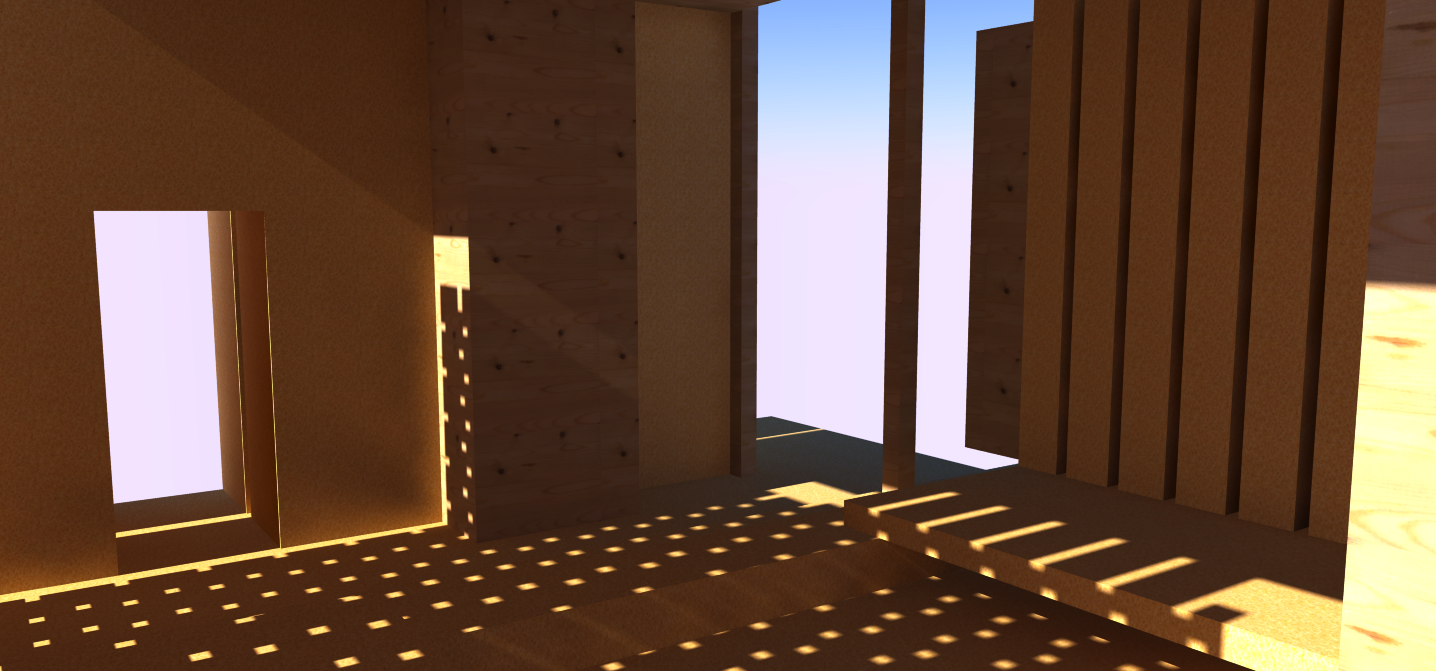
That all ended with my final Arches. I was not happy with mine by the end. This was due to the brick wall that I had to add. Here is a photo of what the Arches Paper looked like without the brick wall.

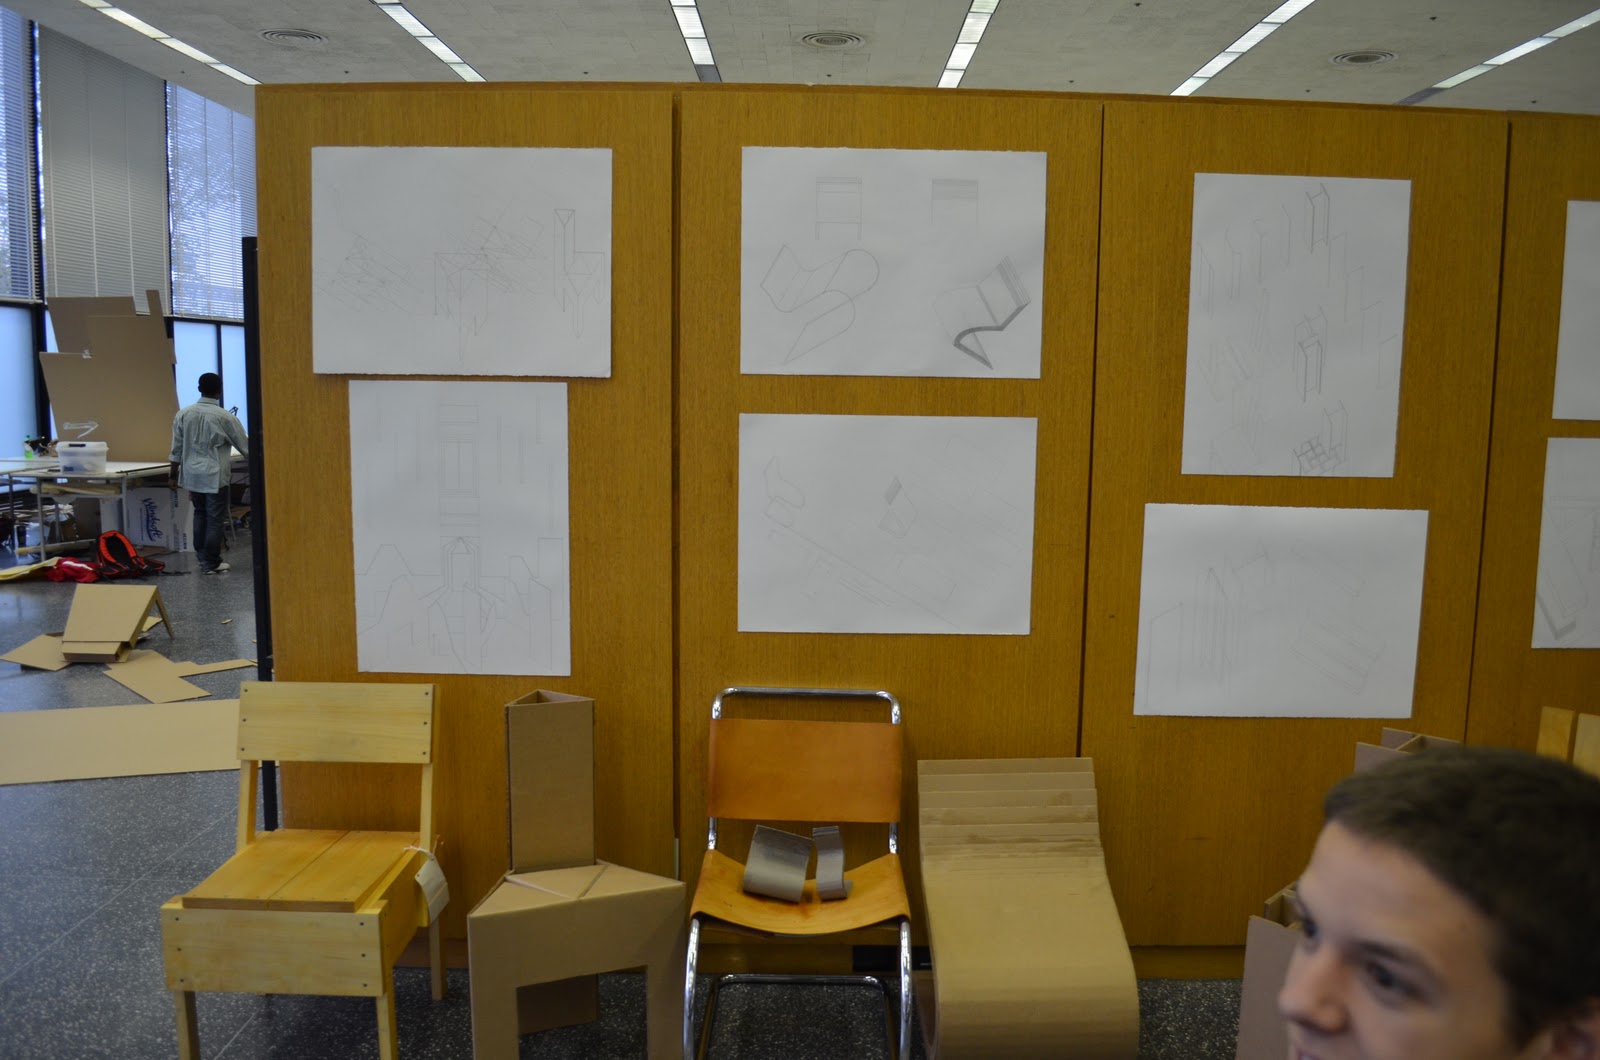
And to wrap it up are photos from the cardboard chair project. 
Here is one of the chair with only a few layers of cardboard.

Along with the chair the assignment also called for an Arches Paper draft of the our chair in comparison to the actual chair. Here is a doodle I did with the conversions for the scale on it. 

I will be back next semester, in January. 


Thursday, December 1, 2011

The End of Studio I.

Well, I have reached the end of my first semester of school, and with that the completion of Studio I. That completion came(for me) when I completed my transitional space model. It was a long road of construction from Saturday afternoon(when I returned to campus from Thanksgiving Break), to all day Sunday, to almost all day Monday(From 9:00 AM to 3:30 AM the next morning), to Tuesday from 1:00 PM to 3:00 AM the next morning.

Here are the photos I took with my phone during the construction process. 
Once I had all my pieces cut, which took most of Saturday, Sunday and Monday, my desk looked like this. 

This was a long process that took a pile of wood and made a model from it.

The assembly of the bricks took 10 hours alone. This is because I did not use the individual bricks that I had made on the table saw in the first place. I used a method that had each of the stacks of bricks as one whole piece. To make them look like bricks I had to score each little line myself, with a hand saw and a miter box. 

It was a long night when this was taken but I was the happiest person around to make it this far in the construction. 

The next morning, the day of the review, my desk looked like this. A mess of pure architecture. 
(The Mountain Dew bottles with the bandanas are a part of a joke that Brian and I have, as Fridays hold our tradition of getting Mountain Dew.)

Here is underneath my desk, just as crazy. (On the left is the back of our final cardboard chair. He has been under there since we finished him awhile back. Along with my backpack, tool box, and a left-over sheet of MDF on the far right.)

Here is the final model.


Monday, November 21, 2011

Refined models, bricks, and a table saw

It has been a busy and crazy week or so. I have been working almost constantly during my waking hours. Besides Studio I also had a large paper due for both my humanities class as well as Arch-100(Introduction to Architecture), along with a midterm in my math class.

I have to utilize all the time that I can before I enjoy a break for Thanksgiving. To try and do this I went to work on the cuts I will need for my final model. The biggest cut is the brick wall that is on my model. I have approximately 420 little 1/4"x1/4"x1/2" bricks. To get the uniform cuts that I would need I set up the table saw, last Friday, in a way that I could take a long piece of MDF that was already at the quarter by quarter dimensions and cut it down to size. To do this I fixed a block of wood to the fence of the saw so I could build up a lot of cuts at once. The process looked like this.
The saw is a SawStop brand saw. This company offers the very amazing safety feature that if anything that conducts electricity comes into contact with the blade while in operation the blade immediately stops spinning and drops. This does include contact with body parts. 

The reason why I bring this up is because I can give a first person testimony for the greatness of this feature. While I was working, a large amount of bricks built up so I stopped the blade to collect them. I have to wait for the blade to complete stop spinning for this to work. However, around the eighth time I went to do this I turned as someone called my name. After a quick conversation I turned to reach for the bricks not fully seeing the spinning blade. Well my thumb came into direct contact with the blade setting off the brake and saving my thumb. I truly am one of the lucky ones because for being such a powerful blade I received a cut that resembled something close to a paper cut. 
It almost is no longer visible. I took this Friday night about 5 hours after the cut had occurred.

Thanks to the brilliant minds at SawStop I just have a small cut on my thumb instead of no thumb at all.

Along with this story of the actual construction of the model I would like to include some more renderings of the refined proposed design as it is of today. 
Front Elevation
Front Perspective 

Side Elevation 
Side Perspective 

Back Elevation
Back Perspective 

Side Elevation
Side Perspective

Plan
Top Perspective 

Here are some shadow tests.


Monday, November 14, 2011

Stairs. Axonometric Stairs.

The Axonometric Stairs project was a little while back. It had its pros and cons. It was a pro that we learned how to do axonometric drawings so well but a con because there was such a lack in creativity. We had to pick a staircase that was either in our world famous S.R. Crown Hall or the slightly less world famous M.T.C.C. (McCormick Tribune Campus Center).  I picked the outdoor basement stairs of Crown Hall, mainly because they are close to my desk and it would be easy to take measurements if I had to while drafting. We not only had to draft the stairs but also the area around it that is apart of the stair space.

Here are the stairs that I chose. 

I felt that the stair space was the hallway that it leads into in the basement and the sidewalk above the stairs, as well as the stairs. 

Here is my Arches Paper of it.  

It was mostly my professor's choice to include the brick wall. This view is offered from high up in Crown Hall. The brick wall is translucent which was achieved through a simple variation in line weights. The hall on the left fades away as does the sidewalk above the stairs. 

Sunday, November 13, 2011

Transitional Space: The final project of Studio I

I have reached the final project of Studio I(out of 10 studios). This project will run until the end of the semester in December, it is a project on Transitional Spaces, a very important aspect of buildings and spaces. Here is a rendering of my refined proposal that I will be presenting to my professor.

This is done on Google Sketchup and then rendered with a rendering software. It is a simple, single-colored model.
Our goal is meant to move from a mass to a plane. The plane must be 8 feet off of the ground. My mass is on the right of the model and the plane is on the left. We had to work with a kit of pieces at certain measurements and must use the whole kit even though we are aloud to cut the pieces. 

Saturday, November 12, 2011

The Final Chair


Well, it took a lot to get here. We presented our mock-up chair and our professor was, for the most part, happy with it. However he did want to see that all important back. We then set that as our main goal for the final chair construction. We spent a very long night working on it(even though I left early seeing as I came down with stomach flu or food poisoning that night). The result was something rather interesting. It had a back but it wasn't the best chair created. We learned from that design that with the amount of cardboard we were given the angle of the cantilever and the angle of the back cannot come from a single sheet of cardboard. Our solution was to take our mock up and modify it as much as we could to give it the illusion of a back.

It the end it was worth it all. The reviewing professors liked it, well partially, for the most part. They did tell us that the idea behind it was perfect, which is good to hear for me. We really had to work with the fact that we had limited cardboard and a back could simply not be produced. So the chair looks, pretty much, the same as it always has.
It might not have been the best looking chair there, but I loved every second of making it and am proud to call it mine. 

Our chair with the MR10(along with our two models of it).

Here is our set up for our presentation