

Our longest project to date has just recently come to an end. It was a very long road. It consisted of late nights, early mornings, hours upon hours of drafting, and building, and an entire spring break of work.
The whole project, in the end, consisted of: plans, sections, elevations, a perspective, an axonometric, and a site plan. All of those had to be drafted by hand. Also, a component model, and designing, drafting, and building a model of an accessory building to be placed on the site of the house.
Drafting has been on going from the beginning to the very end of the project. Construction of the model took place over spring break. Every day, from the very start was filled with working on the model at home. I was able to do so because my there is a machine shop at our house.
Planning for the model took place at school, on my desk covered in an architectural mess.

As always, I had two former study models with me

The whole project construction started with a stack of wood. Ten sheets of 1/8 inch basswood and ten of 1/16 inch.

I traded in my workspace in Crown Hall for one at home, in the shop.

To make the process quicker I drew the floor plan on the sheet of MDF that would soon be the base of the whole site.

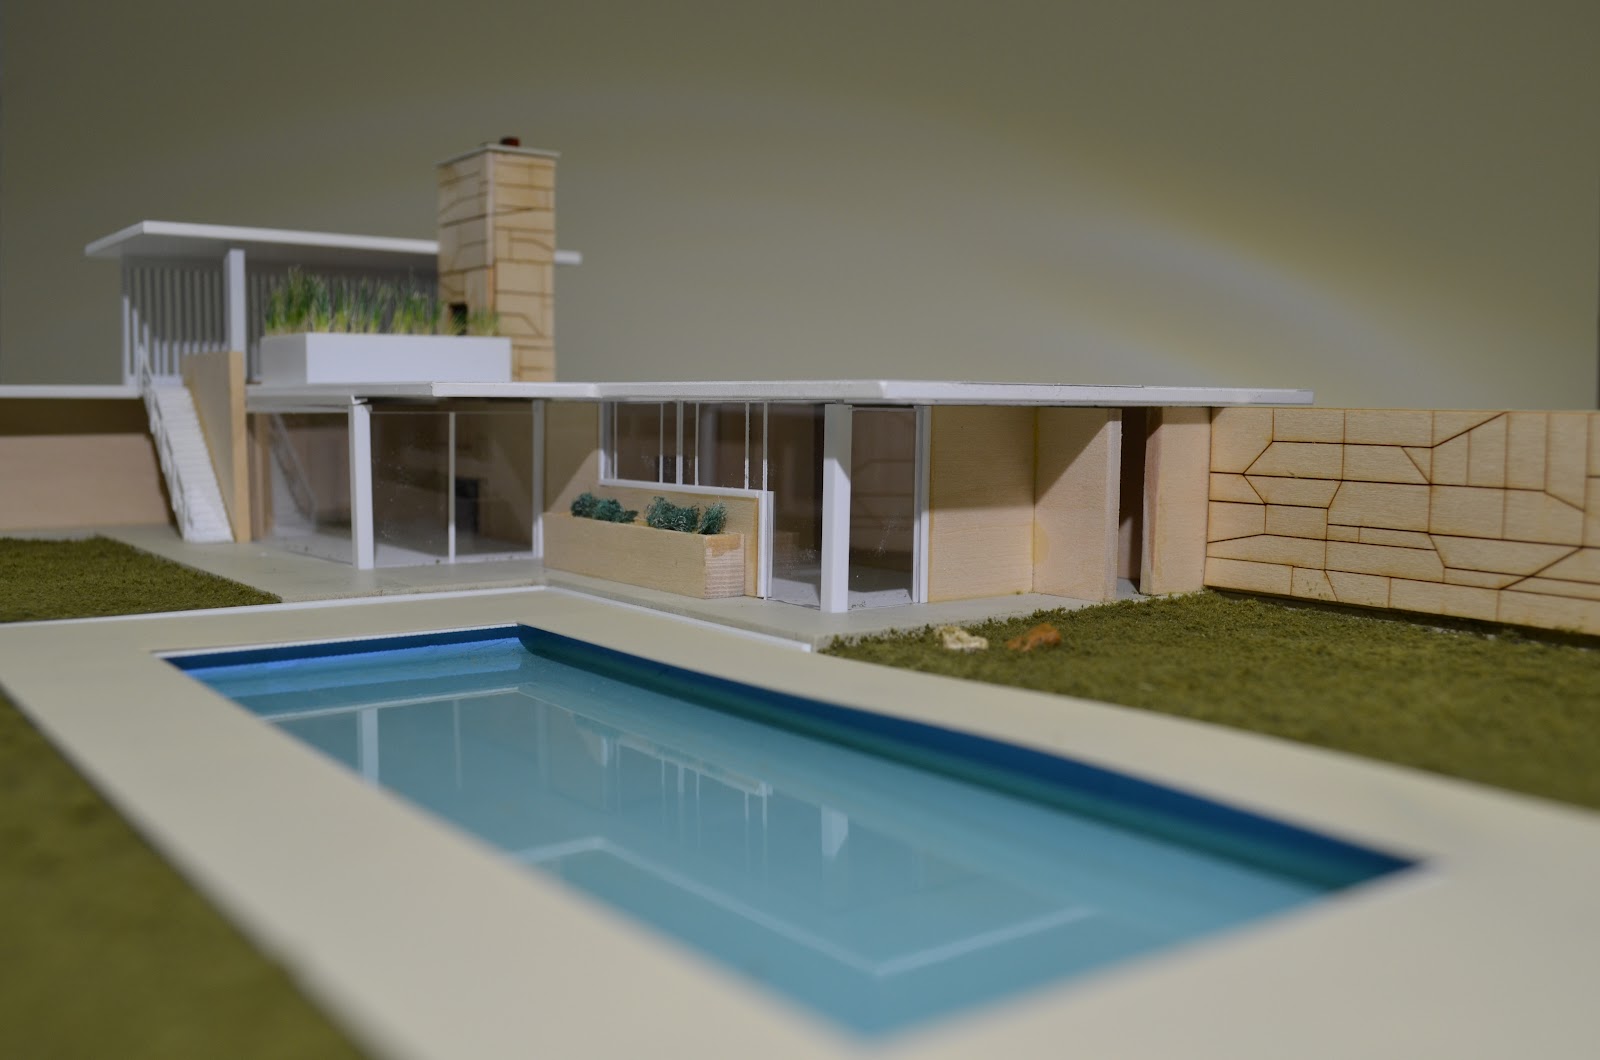
The first part of the house that was made was the servant's area of the house.


To assure that walls would be kept in place while the glue dried metal blocks and magnets were used.

Construction continued with all the walls being made


To raise the house above the rest of the site, a thin sheet of MDF was used to make a base for just the house.

Soon after that, the base was painted, and the pool was routed out.
The base was attached to the larger piece of MDF with contact cement and the pool was painted blue.


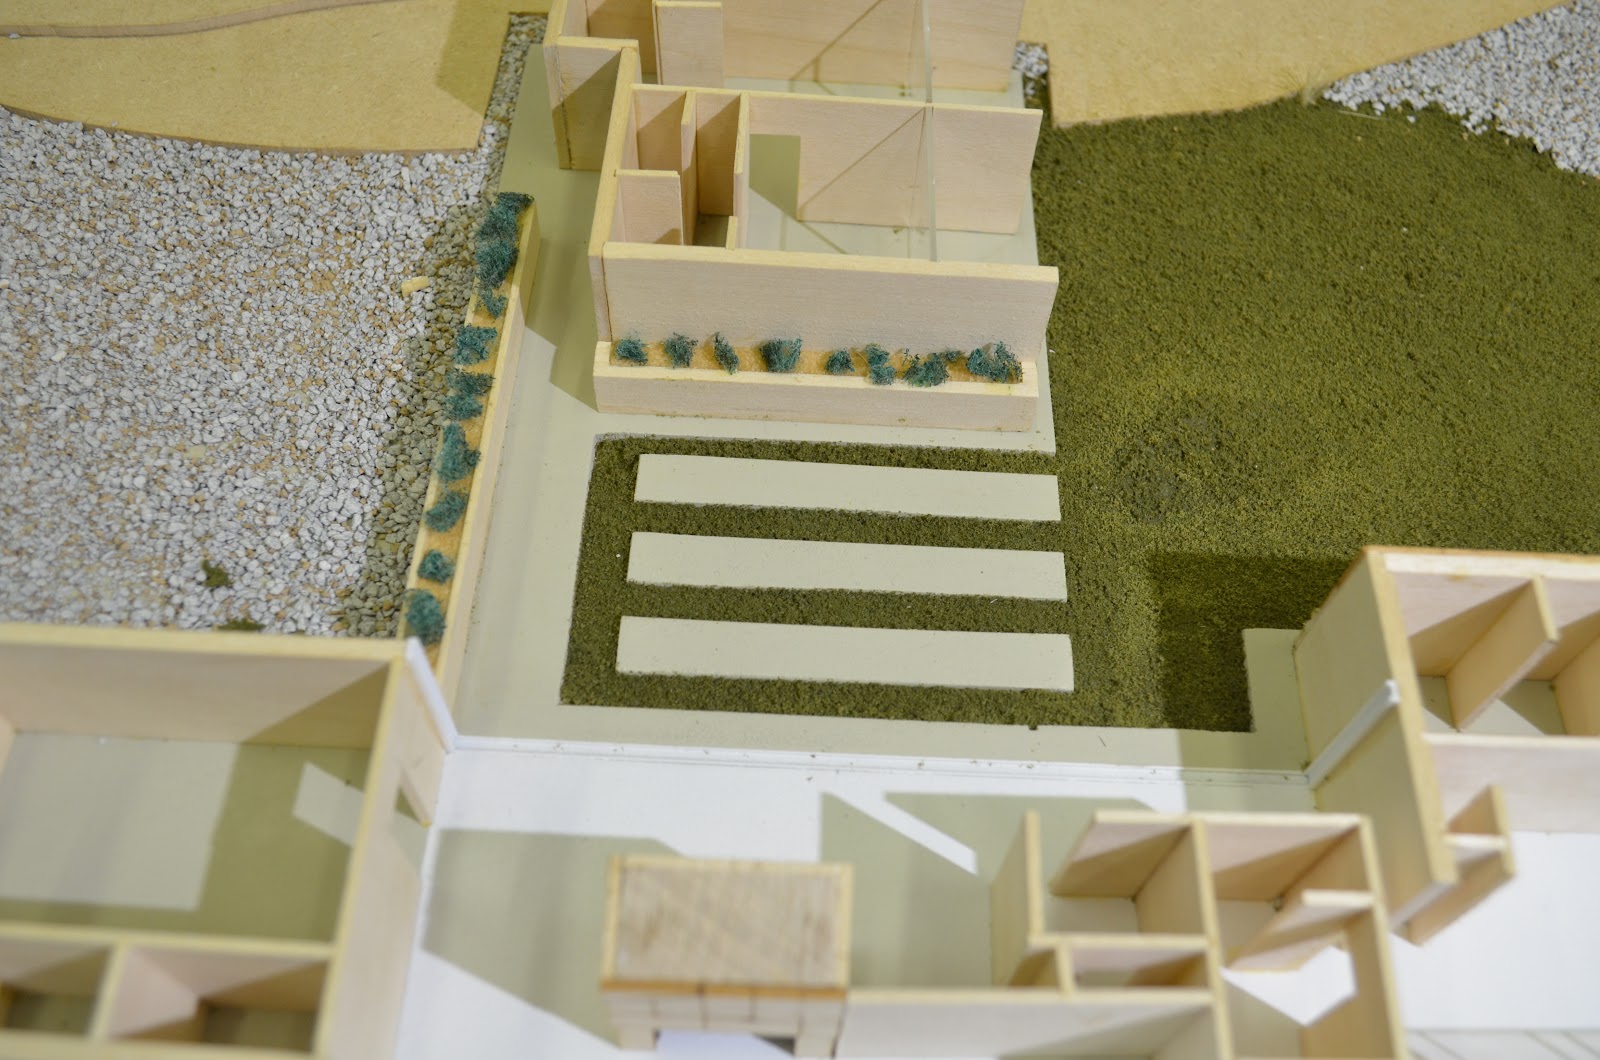
Planters for the house were made from basswood, sand, and scotch brite torn up.

Next holes were routed out for rocks, that came from the landscaping around our house, were made to represent the large boulders found on the actual site.
They were held in place with the help of epoxy.


After the rocks, came filling the pool with epoxy to represent the water. The blue of the paint and the slight yellow of the epoxy created the perfect pool water color.


Then came the glueing of the walls to the base.

The chimney was made from a piece of maple, milled on a milling machine.


The photo above was a sampler made up of the options for the grass, sand, and gravel for the model.
Once all was well and just the right stuff was picked, it was time to glue it all down.


One of the final steps was the roof.

The roof is made out of plastic, covered in sand paper(to give it texture) then finally spray painted white to resemble the real roof.
It all began to start to look just like the house.


In the end the final model was something I am very proud of.


In the end, all the hard work is worth it.
Here is another model from the project, from another studio section.
Here is the model by my friend, Brian, the same Brian who I worked on the cardboard chair and the site geometry projects.
He had Ed's Shed or "Sunken Shed" by David Adjaye.


Hi there, do you know how your friend got hold of the dimensions or floor plans for the sunken house? Im studying a project on it at university and can hardly find any information on it?
ReplyDeleteHi Katie, my friend also had trouble gathering information in terms of drawings. He received all the documents that he needed from contacting the owner of the house, Ed Reeve, directly. His contact information can be found on his website. Best of Luck!
DeleteWow. Great Job! all those nights clearly paid off! I am about to embark on the same project. Unfortunately, we only get 6 weeks! So, a lot of sleepless nights are to follow. lol
ReplyDeleteMy research led me here and I do have a question:
How did you guys figure out the site/contours. Any TOPO map i've found does not give me much. Site dimensions?
Any help would be great.
Thanks
Thank you very much. After these years it's still one of my favorite models to look back at. As for the topography, the property is not that big. The photos never show it but the home is in a very residential neighborhood. The property has a very gradual hill slopping upwards towards the north. My model for the topo takes a slight artistic license when showing those two small levels. The hill doesn't affect the house and depending on how much site you include you may be able to avoid the hill altogether.
DeleteBest of luck!
Do you have the contact information of your friend that did the sunken house? I too am studying that projeect
ReplyDelete